
Configure and deploy Genesys Messenger
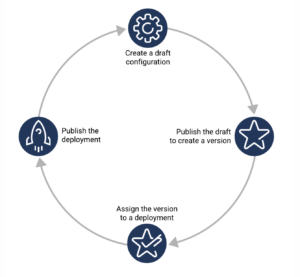
To use web messaging on your website, configure a Messenger window and deploy it to your website. Messenger allows website visitors to interact with bots and agents.
You can create multiple configurations and then choose which one to deploy. For example, if you have multiple domains, you can assign a different configuration to each domain, or assign the same configuration to all your domains. Or, you can have a different configuration for specific situations, such as holidays.
If you have multiple deployments, each web session is contained within its deployment. The contact, journey, and conversation data is contained within the same web session and does not span across deployments. This separation helps you maintain the customer data across different business areas, separate environments that require authentication from environments that do not require one, and trigger a messenger invite for each web session targeting the needs that are specific to the segment of visitors in each session. For information on Messenger session persistence, see Messenger Session Persistence in the Genesys Cloud CX Resource Center.
Define the Messenger window appearance
Define the appearance of the Messenger window in Genesys Cloud CX. For more information, see Configure Messenger in the Genesys Cloud CX Resource Center.
For more information about how developers can configure Messenger, see the following in the Genesys Cloud CX Developer Center:
Define the messaging experience
Define the messaging experience in Genesys Cloud CX and then save the configuration as a new version. For more information, see Configure Messenger in the Genesys Cloud CX Resource Center.