Work with unavailable times
- Genesys Cloud CX 3、Genesys Cloud CX 1 WEM Add-on II、Genesys Cloud CX 2 WEM Add-on I、Genesys Cloud CX 3 Digital、または Genesys Cloud EX ライセンス
- For agents to view and submit unavailable times:
- Workforce Management > agentUnavailableTimes > View and Submit permission
Agents have busy lives, so maintaining a balance between work and personal life is important. Unavailable Times enables agents to indicate their unavailability when they cannot work, such as a doctor’s appointment, a class, or personal tasks. When agents add these times directly in Workforce Management (WFM), the system can create schedules that respect their personal time while still meeting business needs. Click the image to enlarge.

When agents record their unavailable times, WFM uses this information as a hard scheduling constraint, meaning it will not assign work during those periods. The system builds schedules around the provided times wherever possible, selecting shifts or shift variations from the agent’s assigned work plan that fit outside those unavailable periods. To support this, it’s important that work plans are designed with enough flexibility, such as multiple shift options or start to end time variations so WFM can successfully generate a valid schedule.
Unavailable times do not result in split shifts. Instead, WFM will look for an alternative full shift that aligns with the agent’s availability and complies with their work plan rules. For example, if an agent cannot start before 10 a.m., the system might assign a 10 am to 6 pm shift instead of the usual 8 am to 4 pm schedule.
Agents can set unavailable times up to 53 weeks in advance and validate their entries before saving. If WFM detects that the requested unavailability conflicts with the work plan or prevents a valid shift from being scheduled. Agents may still choose to save unavailable times with warnings, in which case their scheduler must work with them to finalize a shift manually. By capturing unavailable times, WFM helps create schedules that align better with agents’ real-life availability, leading to improved satisfaction, reduced scheduling conflicts, and greater fairness across the workforce.
Work with unavailable times
The following section describes the actions that can be performed as an agent and administrator. Click each section for additional information.
As an agent you can create unavailable times in the Schedule tab of the Activity view. To create an unavailable time, perform the following steps:
- From the Menu > Activity.
- スケジュールタブをクリックします。
- In the Schedule tab, on the right corner of the page, click the Unavailable Times icon.
- The Unavailable Times pop-up is displayed. Click the Edit icon.
The Unavailable Times pop-up appears in edit mode with details of the Day/Date, Available, and Unavailable Times. You can select the days and times when you are unavailable across multiple days.Note: Enable the Show Possible Shifts toggle to better understand the shifts you are likely to get, based on your work plan.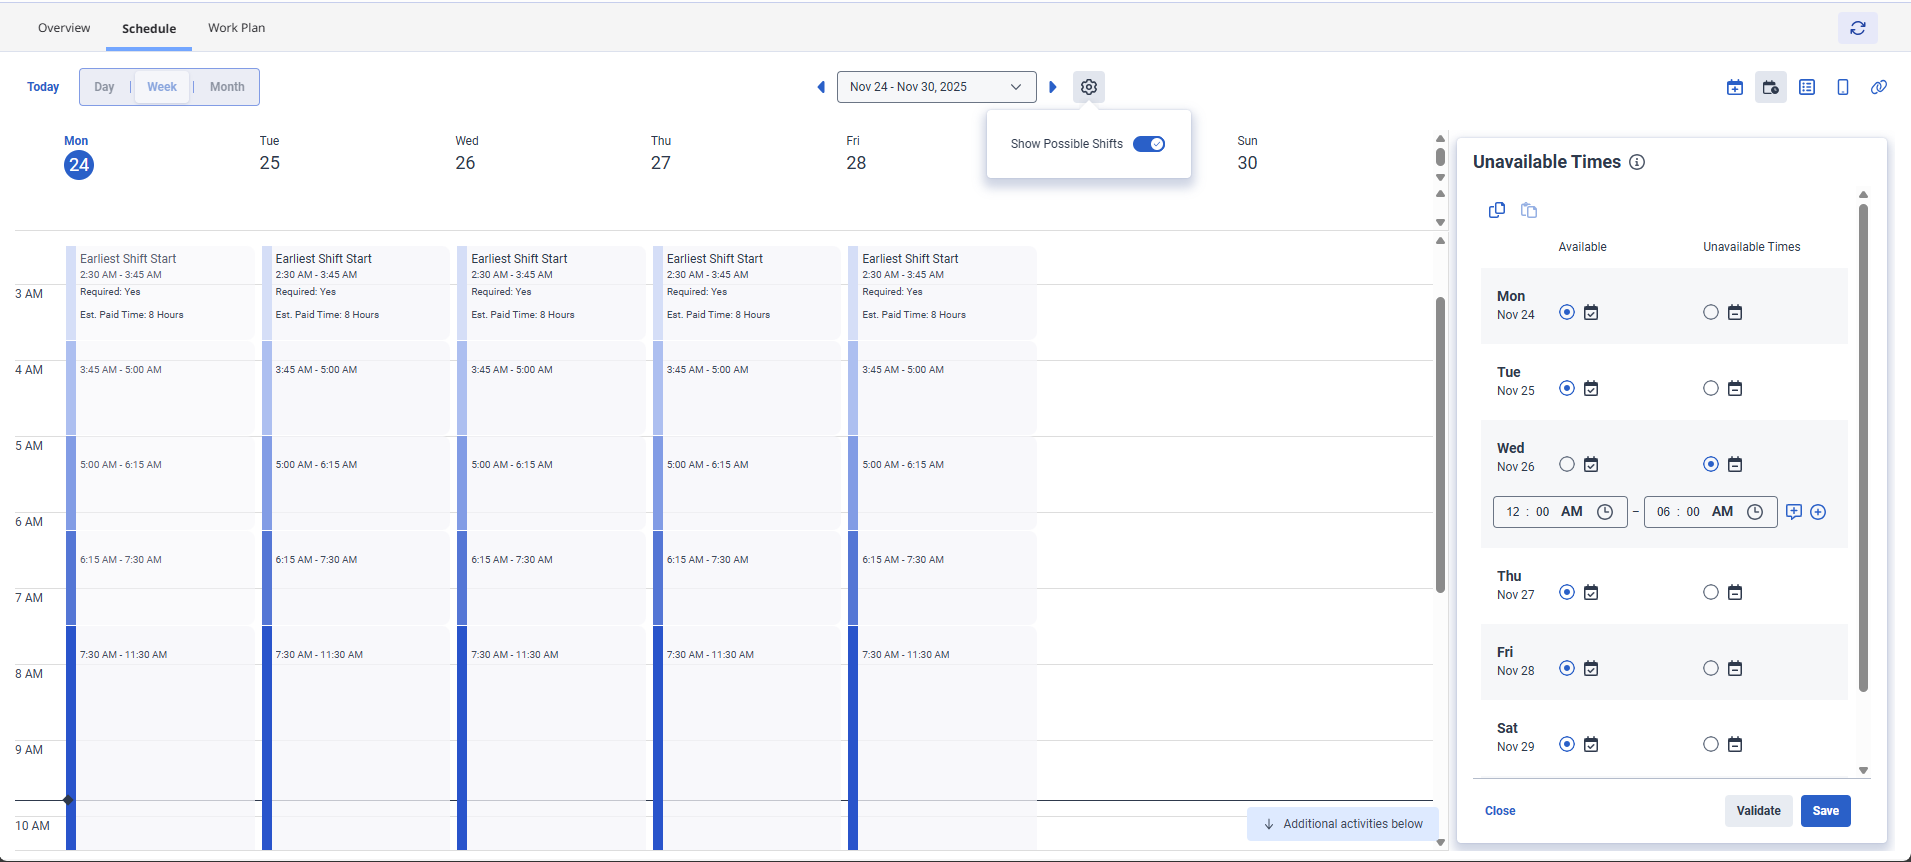
- To select the dates or times of the day you are unavailable, perform the following steps:
- Against a particular day, select the Unavailable Times option.
- From the fields that appear, select the start and end time.
- Click the Toggle note icon to view and include notes as necessary.
- Click the Add time span icon and select another time when you are unavailable. You can modify the time accordingly. You can add up to three times in a day to indicate your unavailability. Note: Using Unavailable Times does not create split shifts. WFM adjusts the assigned shift around the unavailable periods, ensuring the shift fits within the available time. You can mark yourself as unavailable only for the specific times you enter. For example, if you mark yourself unavailable from 9am to 10 am, WFM can still schedule a shift before 9am if your work plan allows it. If you intend not to start work until 10am, ensure that you enter midnight to 10am as your unavailable time. This prevents WFM from scheduling a shift before 10 am.
- To remove the time entered, click the Delete time span icon.
- Repeat the steps as required for other dates. Use the Copy to other weeks icon to copy the unavailable times that you have entered for the week and use the Paste icon to apply the same unavailable times onto other weeks. Whenever you paste Unavailable Times to a week, ensure to click Save so that your unavailable times are taken into account at schedule generation or reschedule. Note: When you add unavailable time entries that violate work plan constraints, such as minimum paid hours or other scheduling rules, warnings appear to alert you of the issue. You can later add or update unavailable times as needed and WFM saves these as Latest Saved in the scheduler or administrator view. During rescheduling, the scheduler or administrator can choose whether to use the Original or Latest Saved unavailable times when regenerating the schedule. For more information about rescheduling your unavailable times, see Reschedule your unavailable times section in this article.
- (Optional) Click Validate. メモ:
When you enter unavailable times and when it violates Work Plan constraints warnings appear, such as minimum paid hours or other scheduling rules. This means that the WFM scheduler cannot allocate a shift based on the unavailable times you have entered. As an agent, you can either revise the entered times or proceed to save your request. Your scheduler can then review it manually to adjust and ensure that your required work hours are met. For more information, see the Warning messages section in this article.
- Click Save. You can skip the validation and proceed to save your inputs. WFM automatically validates your inputs.
The WFM scheduler reruns the scheduling and provides the shifts based on your availability.
Warning Messages
Following are the error messages that you can see when saving unavailable times:
画像をクリックして拡大します。

The following table lists the warning messages that you can view when saving unavailable times:
| Warning messages |
|---|
|
Unavailable times enforce too many days off (<XX days>) for the XX weeks planning period starting <Day and Date>. |
|
Unavailable times do not allow for enough work time to reach the minimum paid time (<hours and minutes>) for the XX weekly planning period starting <Day and Date>. |
|
The minimum shift count for the Weekly planning period starting on <Day and Date> has not been met in your work plan. |
|
Unavailable times do not allow for enough work days to reach the minimum weekly work days (XX days) required for week starting <Day and Date>. |
|
Unavailable times do not allow for a required shift to be scheduled between <Day, Date, and Time> – <Day, Date, and Time>. |
|
Day <day> is required, but entered availability does not allow for any shifts. Either make yourself available to start earlier and/or end later, or request time off. |
|
Availability entered does not allow for enough shift time to reach the minimum weekly paid time <XX hours> required by the work plan. Either make yourself available for more days, start earlier and/or end later on your provided days, or request time off. |
|
Day <day> is required, but entered availability does not allow for any shifts. Either make yourself available to start earlier and/or end later, or request time off. |
|
Availability entered does not allow for enough shift days to reach the minimum work days <X days> required by the work plan. Either make yourself available for more days, start earlier and/or end later on your provided days, or request time off. |
| Your effective work plan for the week is invalid. Please contact your supervisor. |
As an administrator, you can view the unavailable times of the agent.
Configure unavailable times
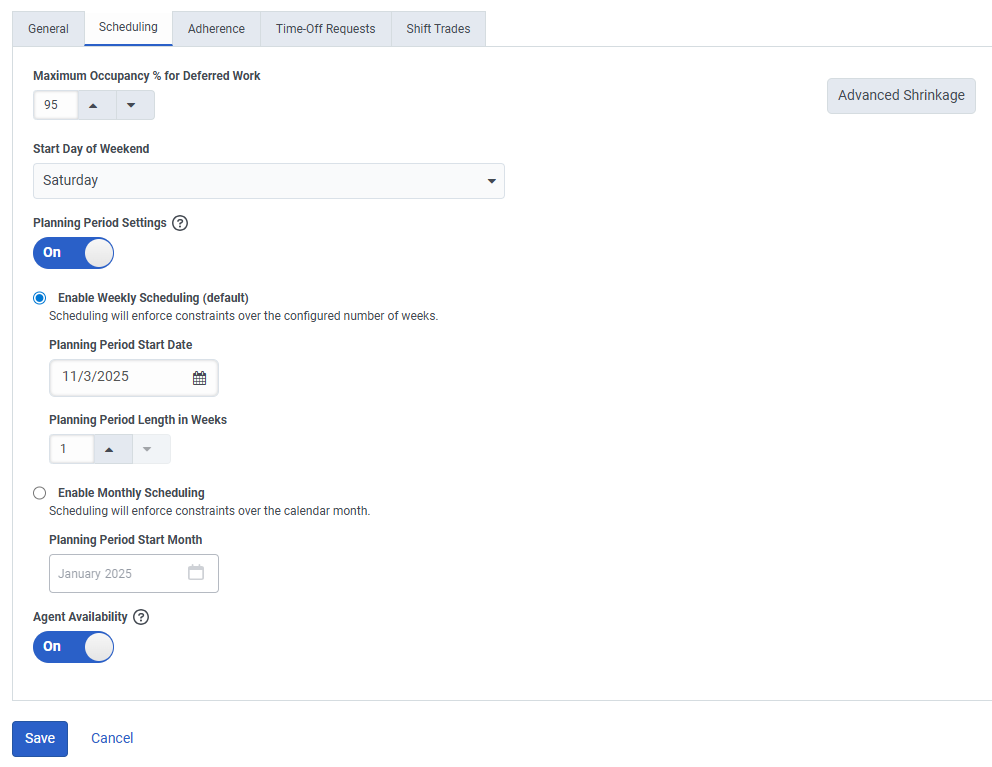
Unavailable Times are not enabled by default. You need to configure the view at management unit level before use. To configure Unavailable Times at a Management Unit level, perform the following steps:
- Click Menu > Workforce Management > Workforce Management Configuration > Management Units.
- The Management Units page appears. Click the Management Unit.
- In the Management Unit page, click the Scheduling tab.
- In the Agent Availability field, turn on the toggle.
- 保存するをクリックします。
View unavailable times
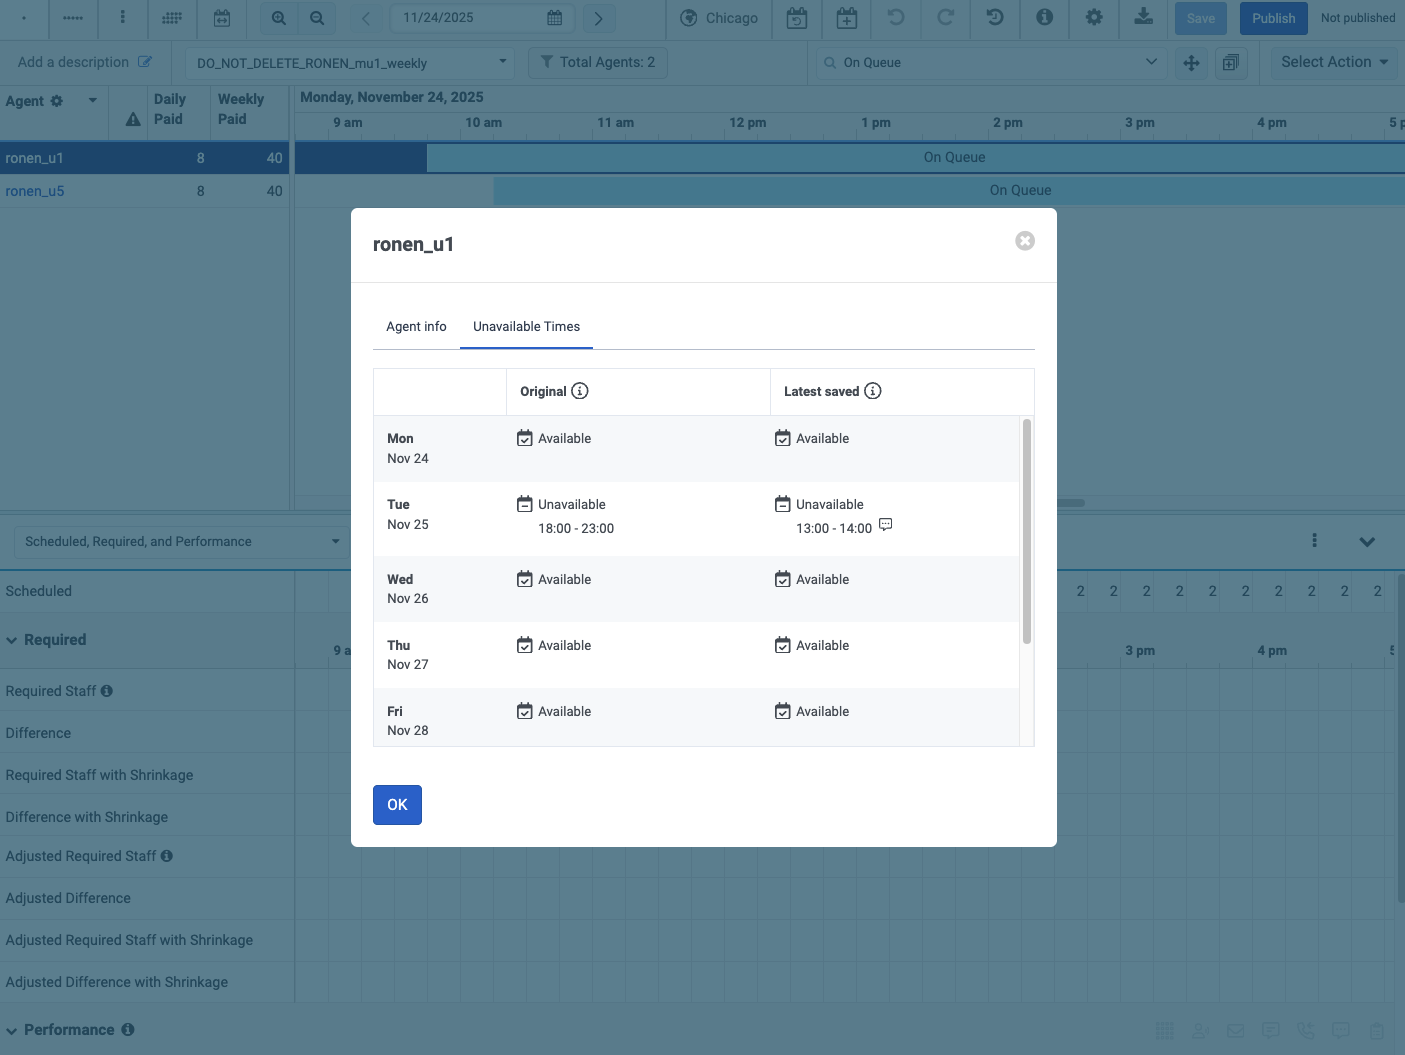
As a scheduler or administrator, you can view the unavailable times that agents add to get a better understanding of the schedule that has been assigned to that agent. Within the Schedule editor you can select the agent to further view the agent details and view the Unavailable Times tab.
You can view the day by day detail of both the original unavailable times added and any updated unavailable times:
- Original: The original unavailable times that the agent added. These are the times that were originally used to create the their schedule.
- Latest Saved: Any updated unavailable times that the agent has added. Agents are not stopped from updating their unavailable times, however these changed times do not take effect until a reschedule is performed, and only if the Scheduler has decided to use these latest saved times during the reschedule process.
To view the original and latest saved unavailable times of the agent, perform the following steps:
- Click Menu > Workforce Management > Scheduling > Schedules.
- The Schedules page appears. Click a Schedule.
- From the Schedule, select the agents name from the list.
- The Agent Details dialog box appears. Click the Unavailable Times tab.